Quickstart
Shipyard creates on-demand ephemeral environments from your Docker Compose config. In this guide, you'll deploy a full-stack application, push a code change to watch your environment auto-rebuild, and optionally set up MCP to manage your environments via AI agents.
To set up the Shipyard MCP with your AI agent, skip ahead to Manage environments with your AI agent
Step 1: Fork starter repository
This quickstart uses the React + Flask starter repository, a full-stack app with frontend and backend services. To fork your own copy, click the button below:
Fork a copy of starter repoStep 2: Create the application
- Go to your dashboard on Shipyard and click on + Application.
- Select the GitHub repository you forked in Step 1 and choose the
mainbranch.

If you don't see your GitHub repository, click the link above the repository dropdowns. This takes you to your GitHub account's Shipyard configuration, where you can add the repository. Read more here.
- Click Select services. Shipyard automatically detects services from your
docker-compose.yml.
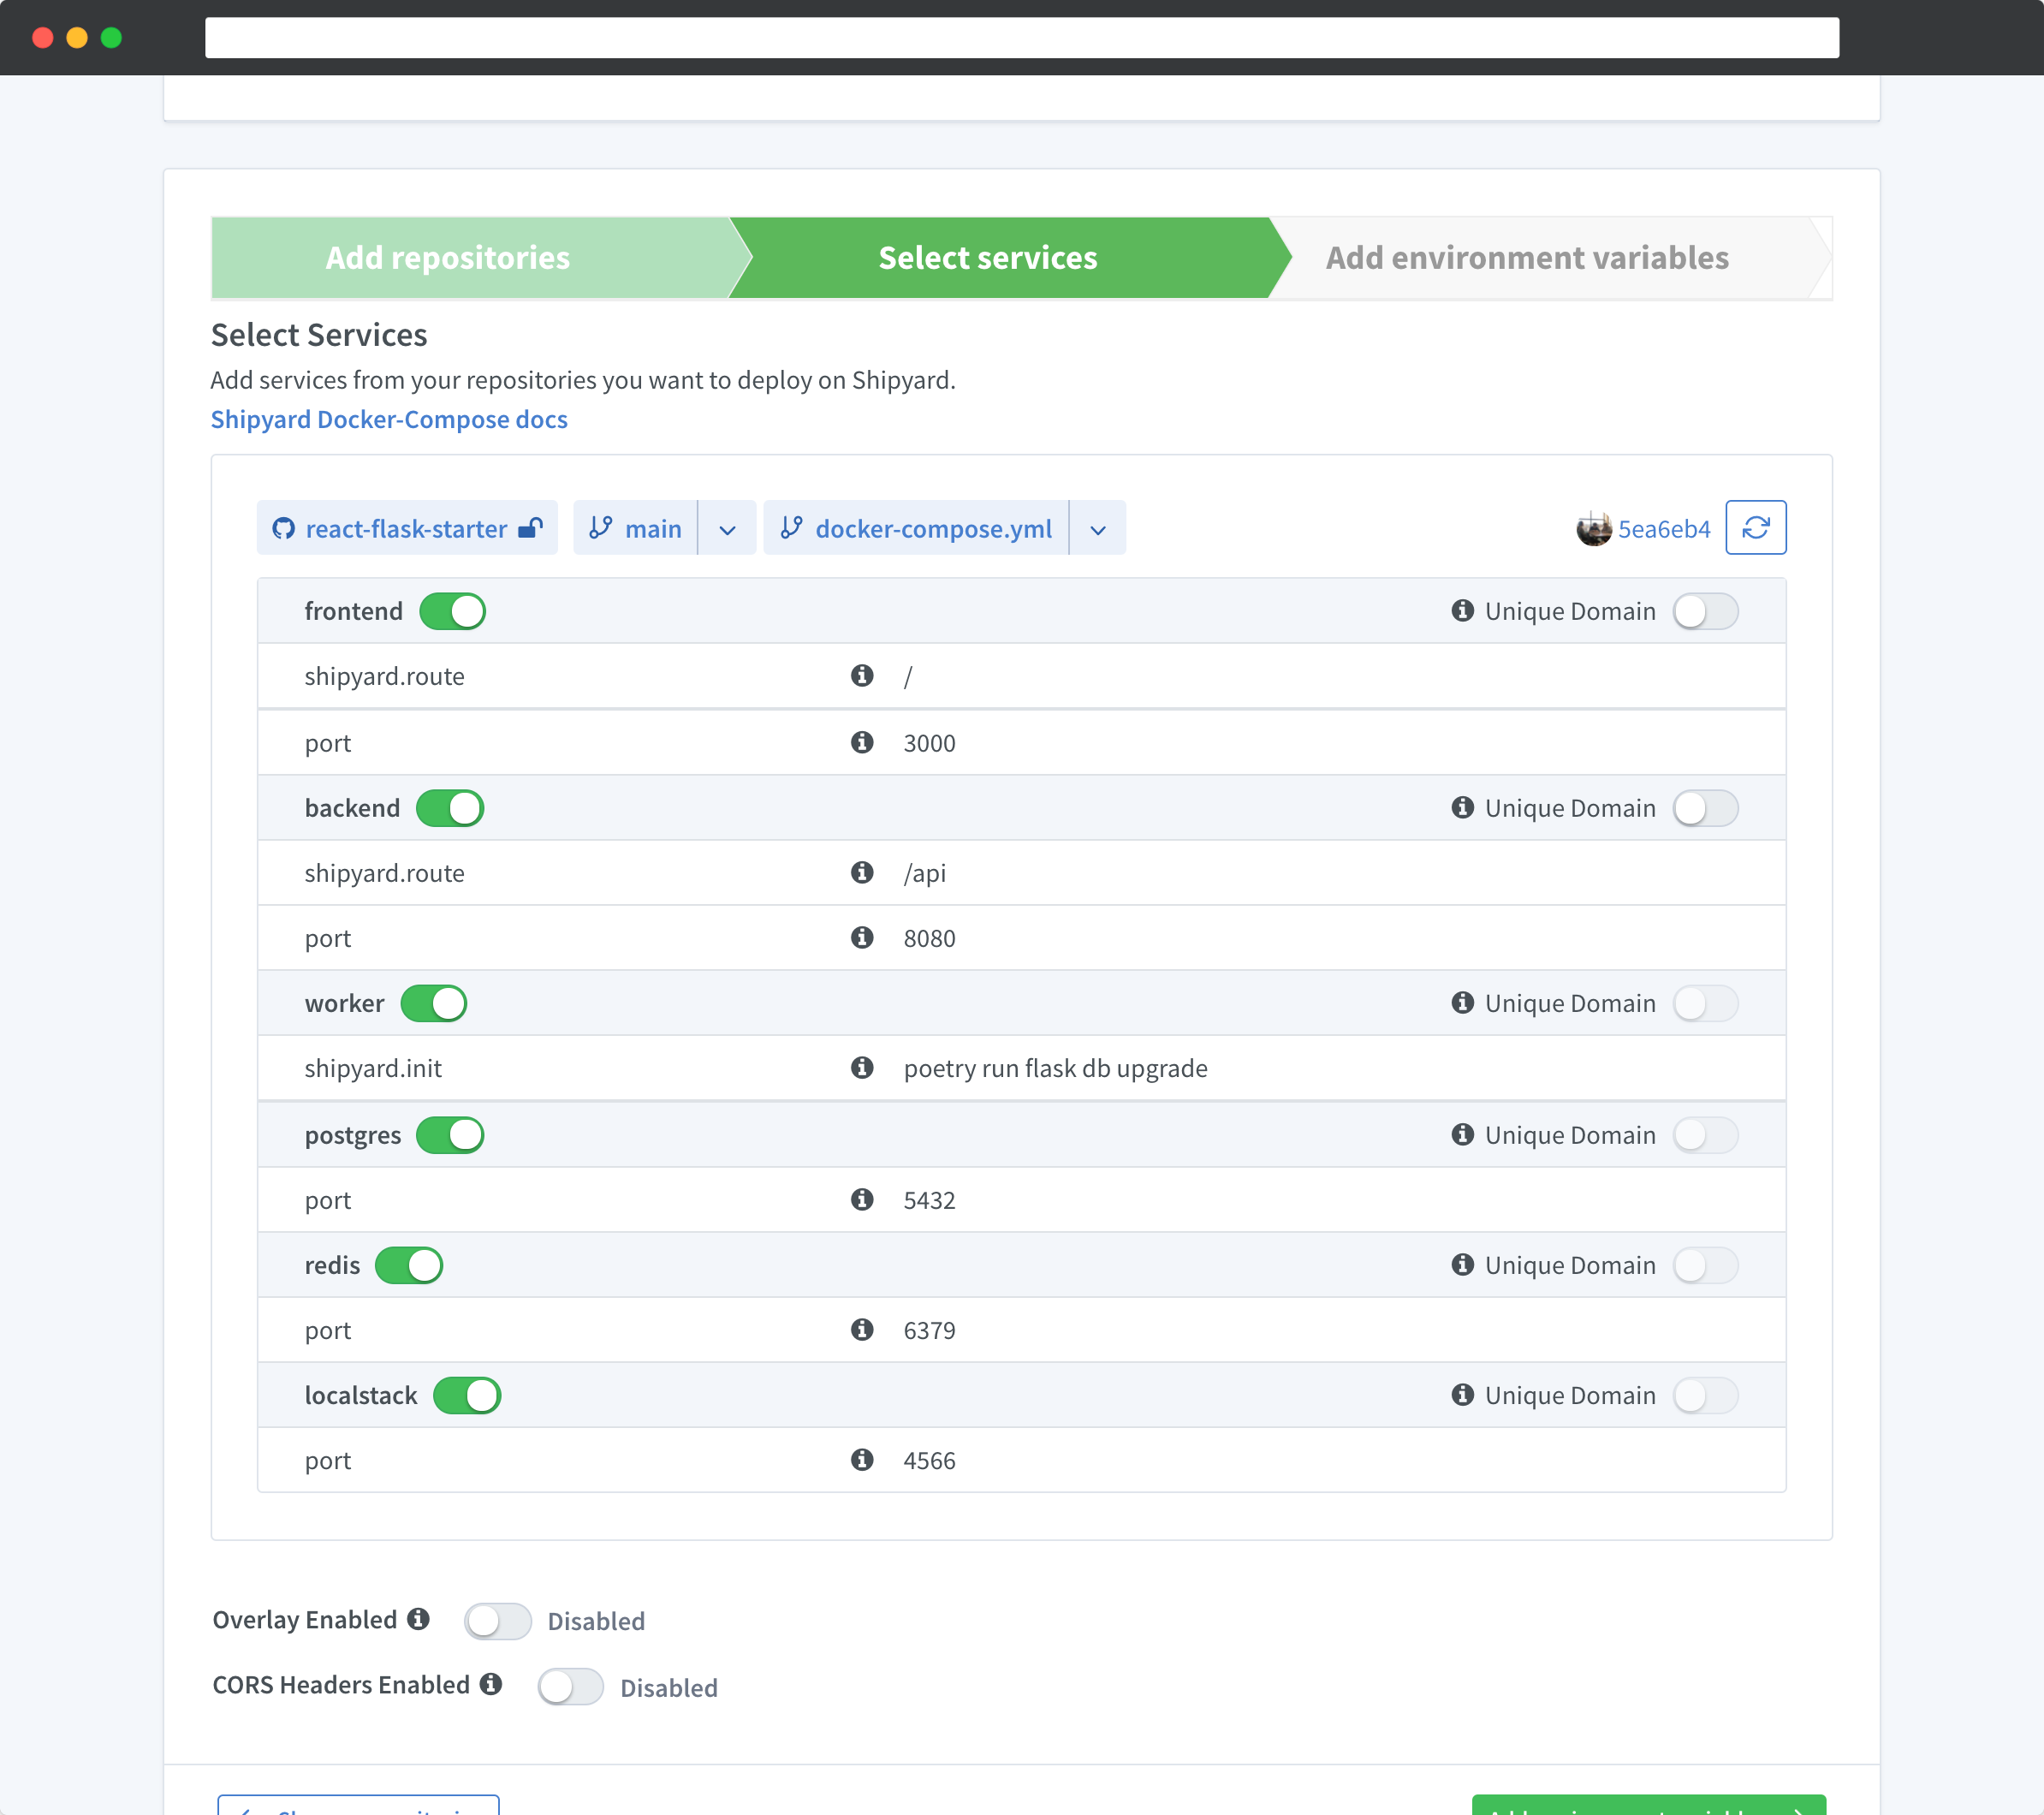
- Click Add environment variables to configure any required secrets or environment-specific values.

- Click Create application. Shipyard starts building your environment.
Step 3: Monitor build and visit your environment
Shipyard is building your environment from the Docker Compose config. Click the Build Details button on your dashboard to watch the Docker build logs stream in real-time. Once the services are running, you'll see live container logs.
When your environment is ready, a green Visit button appears at the top of the page.
Read more about the build details and build history pages.
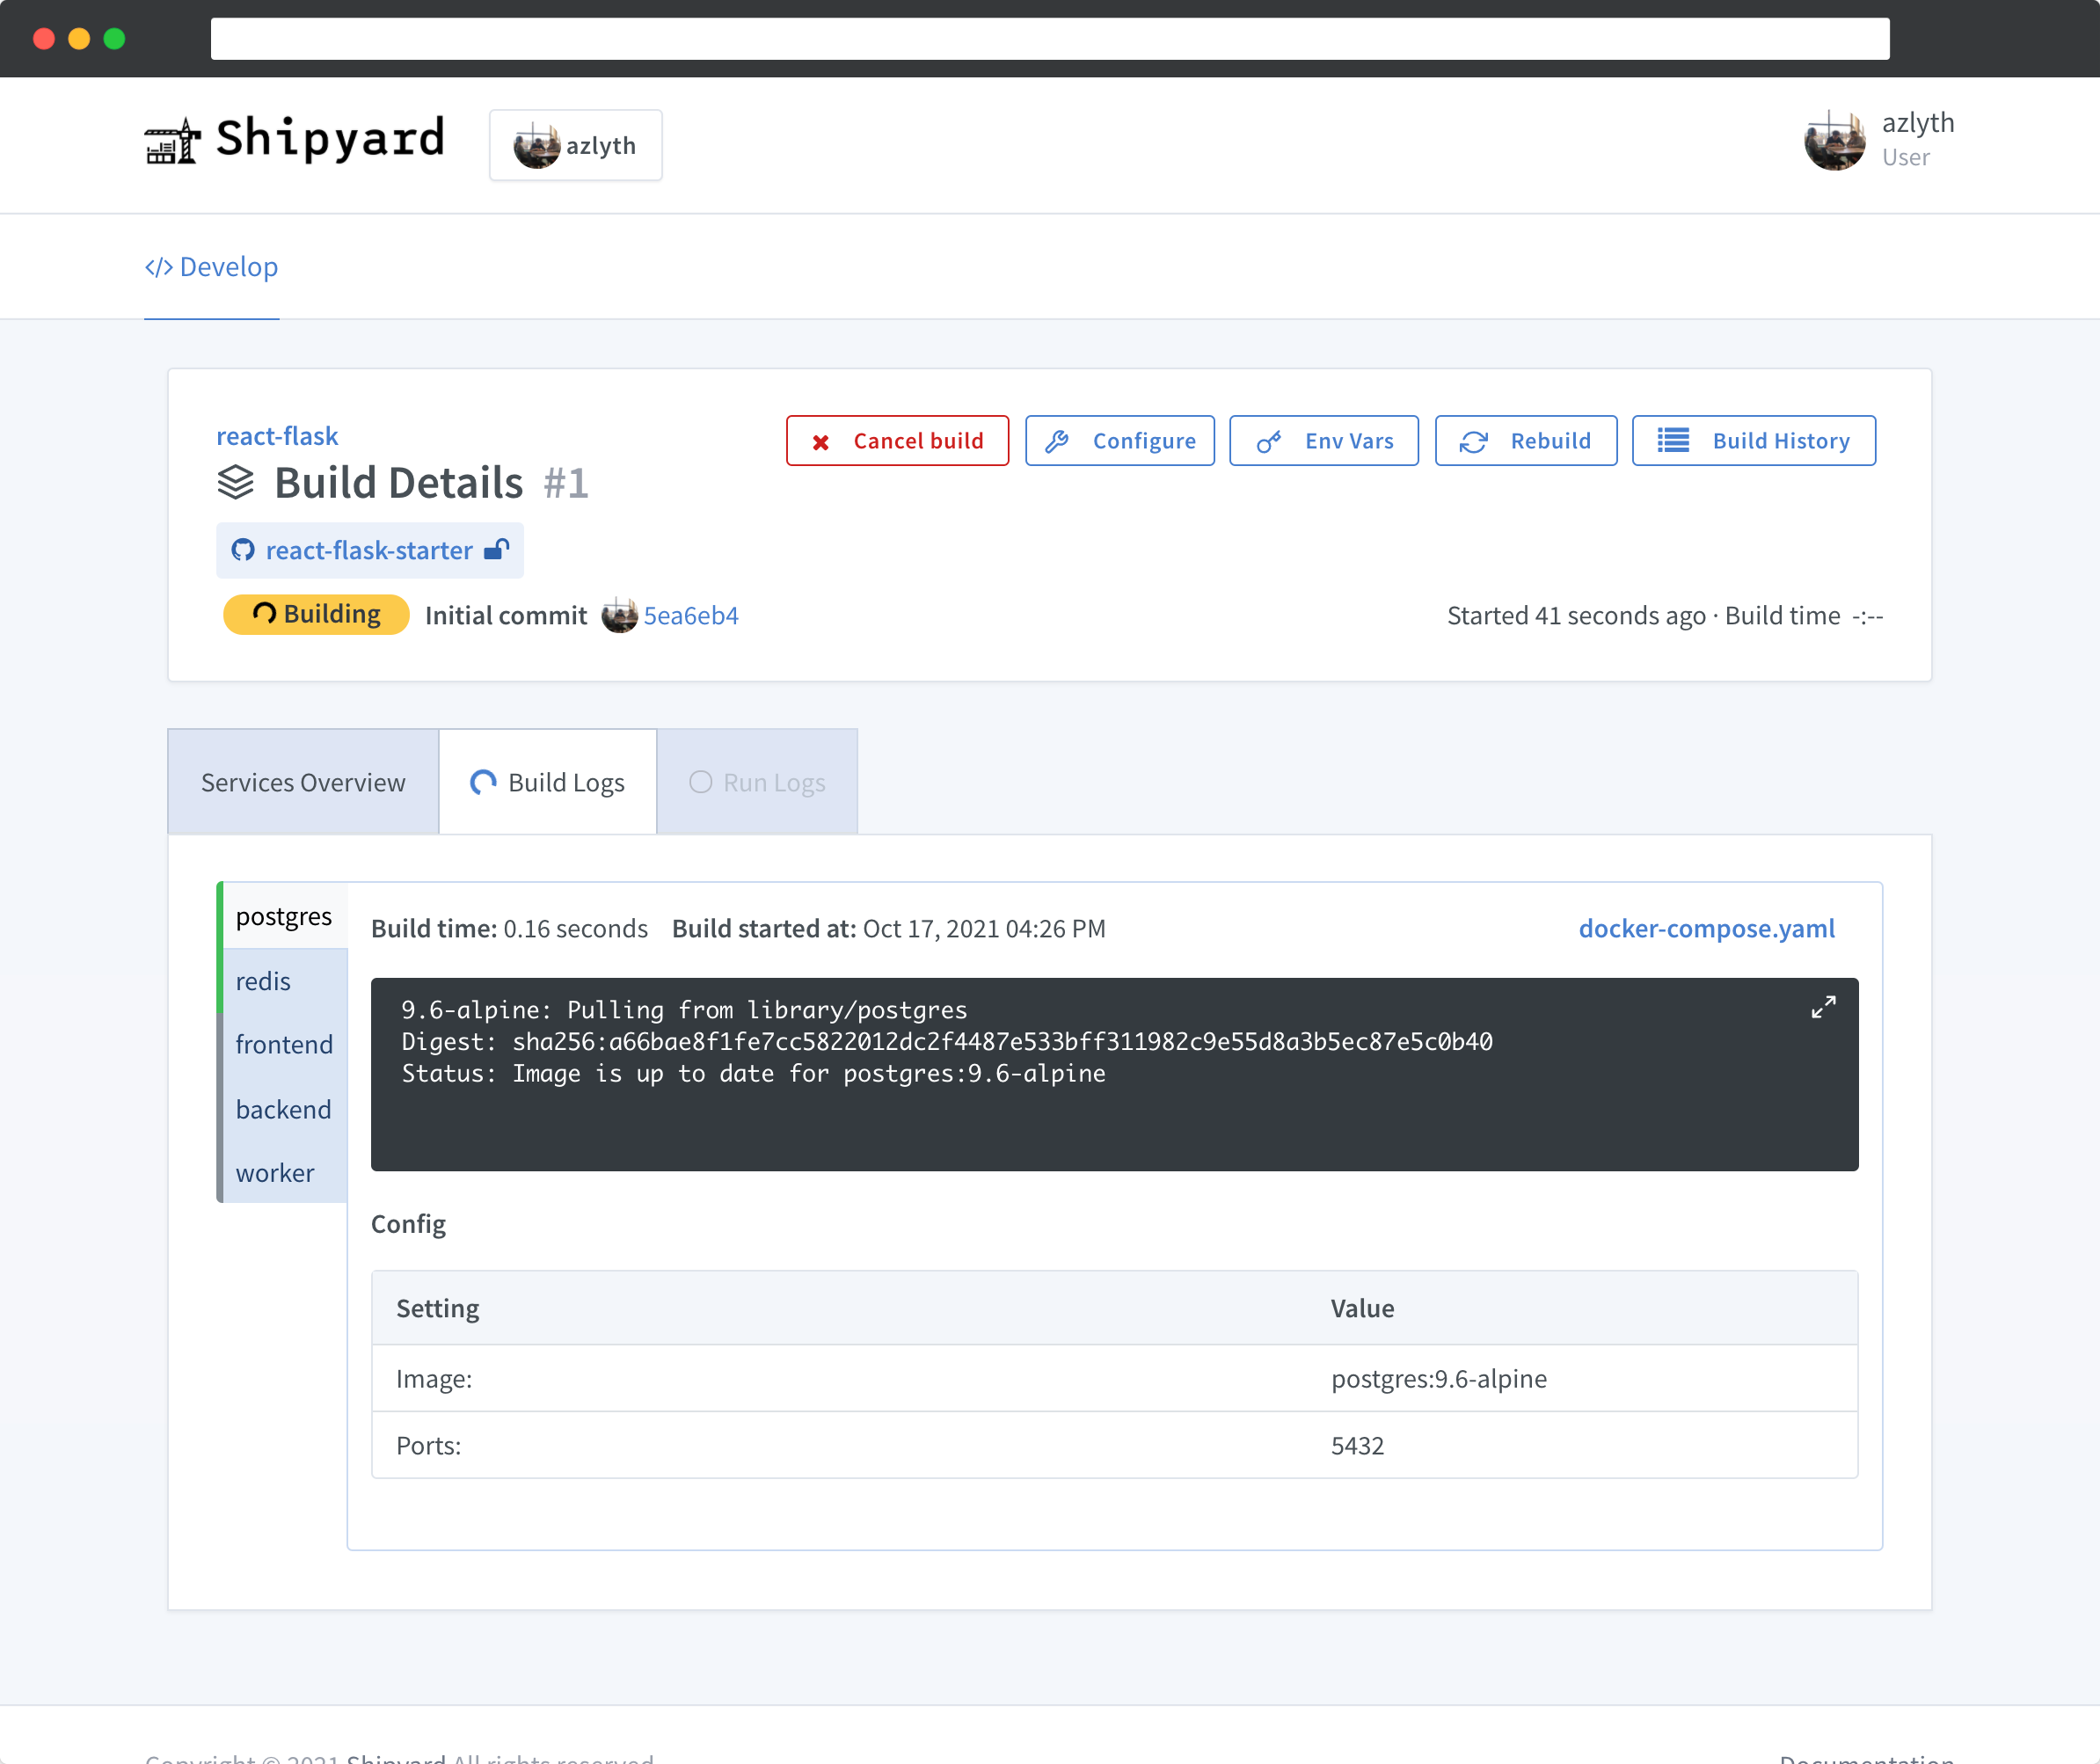
Click the Visit button to access your environment at its uniquely-generated URL.

Your app is now ready for review, testing, and QA.

Give your teammates access to this environment by adding visitors.
Step 4: Push a commit and watch it rebuild
Shipyard environments respond to GitOps events. If you push a commit to your tracked branch, your environment will auto-rebuild to reflect the latest code changes.
- Clone your forked repo locally:
git clone https://github.com/<YOUR_USERNAME>/react-flask-starter.git
cd react-flask-starter
- Make a small change. Open
client/src/App.jsand modify the welcome text:
<h1>Hello from k8s :)</h1>
- Commit and push your change:
git add .
git commit -m "update h1"
git push origin main
Go back to your Shipyard dash. You'll see your environment immediately start rebuilding.
Once the build completes, refresh your environment's URL to see your changes live.
This GitOps workflow keeps your ephemeral environments continuously in sync with your branches, so you can instantly + easily test code changes.
Step 5: Manage environments with your AI agent
You can use your AI agent (e.g. Claude Code, Cursor) to control your Shipyard environments using the Shipyard MCP integration.
Install the Shipyard CLI + MCP
brew tap shipyard/tap
brew install shipyard
Configure with Claude Code
Grab your Shipyard API token from Org Settings and run this:
claude mcp add shipyard --env SHIPYARD_API_TOKEN=your-token-here --env SHIPYARD_ORG=your-org-name -- shipyard mcp serve
From here, you can ask your agent to perform environment-related tasks.
Try asking: Show me the logs from my frontend service or Restart my environment for PR #17
Read the MCP docs for more info.
Next steps
Now that you've gotten an environment up and running, check out some more Shipyard features:
- Configure auth to grant team access to environments
- Add env vars and secrets for different configurations
- Set up GitHub notifications to track build status
- Explore starter repos for other tech stacks
- Learn about supported Docker Compose labels